h1

How to make hard cider

March 7, 2013

Hello, everyone! As some of you may know, Julie’s working on her “30 by 30” list. For those of you aren’t familiar with this, she came up with a list of 30 things she wanted to do by the time she turned 30. One item on her list included having a guest blogger. That’s where I (her husband, Dave) come in.

I don’t know the first thing about sewing, quilting, cooking, etc. The closest I get to Julie’s craftiness is probably through brewing and winemaking. Along those lines, Julie and I have recently taken an interest in trying our hand at making homemade hard cider. I’ll use this opportunity to share some information about our first attempt and how anyone can make hard cider at home.

First things first, equipment / ingredients:

Cider! (unpasteurized from a local cider mill is suggested)
A stock pot (slightly larger than your volume of hard cider that you want to make)
Wine tannin
Pectic enzyme
Cider yeast
Sanitizer (StarSan or Iodophor, for example)
Fermentation bucket with lid
Racking cane w/ tubing
Airlock
Potassium metabisulfite
Bottling bucket with spigot
Bottle filler
Bottles
Bottle caps
Bottle capper

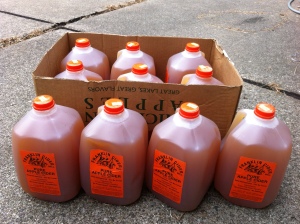
Making hard cider is relatively simple process. Julie and I decided to do a 10 gallon batch, but you can scale the amount to whatever is preferred. You’ll want to use cider without any preservatives, since any preservatives will inhibit or prevent the cider’s ability to ferment into hard cider. We used fresh, unpasteurized cider from our local cider mill.

2012-09-23 16.17.49

One of the key things to keep in mind when you’re fermenting beer/wine/cider, is that bacteria is usually your biggest enemy. Fermentation works by creating an environment in which yeast can consume sugars and undergo a process that results in alcohol being produced. While making an ideal environment for your yeast, you also make an ideal environment for other bacteria to thrive. Bacteria can easily add off flavors to your cider, or ruin it completely.

To kill off any nasties in the unpasteurized cider, we pasteurized the cider by heating it to 170F for 45 minutes in a large brewing pot. Any stock pot will work just fine. In addition to killing off any bacteria, this process will also kill any wild yeast. There are all types of natural yeasts found with any fruit, and each yeast strain will contribute a different flavor profile when allowed to ferment. Wild yeasts could potentially create a wonderful product, or they could be horrible. We chose to kill off any wild yeast so that we could later add our own specially selected yeast strain that is known to produce excellent cider. I feel that cider is too expensive to gamble on wild yeast working out.

2012-09-23 16.21.21

In the last 5 minutes on the heat, we added pectic enzyme, and wine tannin. Pectic enzyme is mainly used to break down pectin to produce a nice, clear looking cider. Wine tannin is used to add a bit of tartness/complexity and will aid in the stability and preservation of your cider. Pectic enzyme is often added in amounts of 1 tsp per 5 gallons, but follow the directions of the package if available. Somewhere between ⅛ tsp and ¼ tsp of wine tannin per gallon should be in a reasonable range depending on the desired tartness.

After pasteurization, it’s especially important that anything that comes in contact with the cider is both clean and sanitized to prevent infection. I recommend using StarSan to sanitize equipment, which is a product available at any local homebrew shop or online.

Now that the cider is pasteurized and the additives are in, you’ll want to bring the cider down to around 68F for fermentation. An easy way to bring the temperature down is to create an ice bath. This involves filling a sink with ice water, putting a sanitized lid over your pot, and letting the pot rest in the water. Remember if you want to stir a little to cool the cider down faster, or use a thermometer to take a temperature reading, that that equipment should be sanitized!

Once cooled, you’ll want to pour the cider into a sanitized vessel that you can use to ferment in. A plastic fermentation bucket with a lid, 20%+ larger than your cider volume, works great. 7.9 gallon buckets are commonly available at homebrew shops and work well for a 5 or 6 gallon batch.

2012-09-23 18.32.57

At this point, you’re ready to add the yeast! Open up a package of your yeast of choice (we used Lalvin EC-1118) and sprinkle it over the top of the cider. Fermentation buckets generally come with a lid that have a small hole drilled so that you can insert an airlock. The airlock allows the CO2 produced by the yeast to be released, while keeping oxygen out. Put the sanitized bucket lid and airlock on the bucket. The airlock should be filled halfway with either StarSan or a cheap alcohol like vodka.

It’s best to leave the cider to ferment in an area that’s as close to 68F as possible. At this point, simply let the bucket sit for four weeks to let the yeast work its magic! You should start to notice the first signs of fermentation (a bubbling airlock) in 12-48 hours after adding the yeast.

Once fermentation is done, you’ll want to used a sanitized racking cane to siphon the cider into a clean/sanitized bottling bucket. Hard cider can be very dry and tart by default, and it often helps to “backsweeten” by adding sugars to sweeten it up a bit. Adding honey or brown sugar to taste is a common practice.

If you add more sugars, fermentation could start up again, which you don’t want, so it’s good to add potassium sorbate (in amounts on label) to halt any further fermentation. It’s probably good to add the potassium sorbate even if you don’t add more sugars just to be sure no fermentation takes place once your cider is bottled. Fermenting cider in bottles can result in dangerous bottle bombs as CO2 pressure increases! It’s also good to add potassium metabisulfite at this point to better preserve the cider. This process will create a still / non-sparkling cider.

Sanitize enough bottles and caps for your volume of cider. Fill your bottles using your bottle filler and then put on the caps with your bottle capper. At this point, your cider is done and bottled! The hardest part now is waiting. Young cider can taste outright horrible at first, with strong sulfur smells. This is normal! The most important advice I can give you at this point is to not pour it out and to simply wait for it to mature. The character of the cider will drastically improve if you let it sit in the bottle for an extended period of the time. You’ll want to age the cider for six months to a year.

Enjoy!

h1

November Foodie Penpal

December 1, 2012

Such a great month for the November Foodie Penpal!

Hollie of www.fueledbylolz.com sent me this amazing package:

November Foodie Penpal

Here’s what it had in it:
2 Quest Chocolate Crunch Bars (YUM!)
1 package of dried blueberries
1 package walnuts
2 Alternative Baking Company cookies
2 packages of Starbucks coffee

Thank you so much, Hollie, for sending me a package full of deliciousness! I had never tried Quest bars or Alternative Baking Company cookies, but I’m totally sold on them now!

h1

October Foodie Penpal

October 18, 2012

Guess what I got – if you guessed my October Foodie Penpal package from Heather at takingmysweettime then you guessed right!

Prepare to be jealous:

Image

Let me break it down for you:

Spinach and artichoke kettle chips

Homemade spicy pretzels (so good!)

Cranberry-mango salsa

Chocolate and vanilla almond butters

Dark chocolate peanut butter cups

Strong dark chocolate bar

Almonds and sea salt in dark chocolate bar

Cherries and almonds in dark chocolate bar

Thank you, Heather! I love everything (am currently munching on the dark chocolate peanut butter cups and am in HEAVEN).

I have to apologize. This post should have posted on October 31st, but is going up a little early. Dave and I are taking off to Amsterdam and India. I’ll have lots of pictures when we get back, I’m sure.

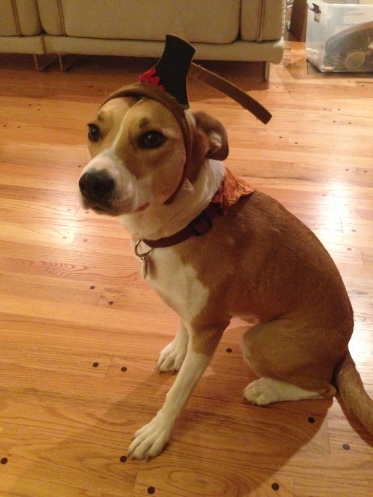
Until then, Clover wanted to wish you a Happy Early Halloween!!

Image

h1

September Foodie Penpal

October 2, 2012

Huge thanks to Trish from iamsucceeding.com for the awesome September Foodie Penpal package! Look at all the amazing yummy stuff she sent to me:

Image

If you want to participate for the October Foodie Penpal, head on over to The Lean Green Bean and sign up!


Can’t write more…. must keep quilting…. one quilt top down, two to go….

h1

August Foodie Penpal

August 31, 2012

This month was the first time I participated in Foodie Penpals. I sent a package to a woman in California and I got the most amazing package from Maggie of Notes from Maggie’s Farm (her blog is awesome!).

Seriously, check out my mad loot:
Box

That’s right, a bean spice blend, spicy corn bread mix, spicy biscuit mix, Stubb’s BBQ sauce, and dry rub from the Salt Lick. I don’t know which one to be the most excited about!

I haven’t tried any yet, because I’m logging many hours over overtime at work and that is drastically cutting into my everything-else-time…. but I’m really looking forward to…. all of them!

Thank you so much, Maggie! This was my first month of August Foodie Penpals and it was totally worth it. I can’t wait for next month 🙂

h1

5: Kill a Lobster

August 3, 2012

A while ago, I made a list of 30 things to do by the time I’m 30. I told my friend, Jess, about my list and lo and be hold she spur of the moment convinced me to check #5: Kill a lobster off my list.

A note: I didn’t add “kill a lobster” just for the sake of taking a life. As a omnivore I feel strongly that I need to respect the sacrifice the animal is making. I enjoy eating lobster and I felt that I should know how to kill and cook one to be able to appreciate the true cost of the meal.

Much like the Pig Roast – I’m not trying to say this is the “right” way to do it, but it’s the way we did it and the results were delicious.

So, here’s how we did it –

1. Jess picked up lobsters, invited us over, and promised to show me how to do everything. Dave was put in charge of the camera phone. In hindsight, we should have used a real camera – sorry on the shitty picture quality!

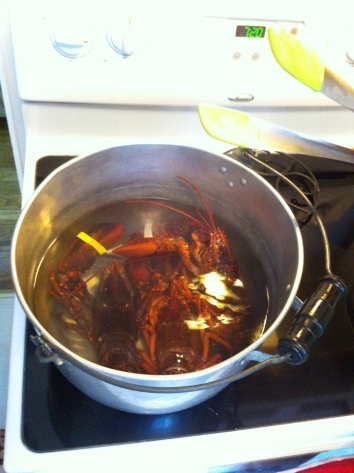
2. We started by putting a huge pot of water on the stove to boil. We seasoned the boiling water with lots of salt and lemon.

Image

3. Don’t do what I did. Don’t name your lobster Phillip. Don’t do this even though it feels right. And then, don’t play with Phillip on the counter – it will only make the next steps harder. By the way, this is Phillip (isn’t he cute?… for a lobster):

Image

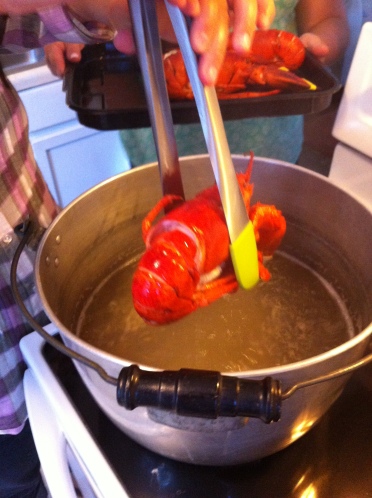
4. When the water was really boiling, we picked up the lobsters by holding them firmly by the back, behind the legs, just above their tail. Even though they had been in the fridge and were sort of lethargic their tails were extremely strong and it took some focus to get them to the pot. We then lowered them quickly into the boiling water head first. This is quickest way to kill them and most humane. I was unprepared for how they squirmed and moved around even after they had been in the water for several seconds. Steel yourself for this – the water is already salted – no need for tears (in truth, I didn’t cry… but man… watching Phillip convulse was a little much after we had played on the counter).

Image

5. We boiled the lobsters for 15 minutes – or until they turned bright red and floated to the top.

Image

The lobsters were delicious. There was something primal and satisfying about cracking the shells and sucking out the juicy bits from the legs.

Image

All in all, I was glad to have the experience. It was smple – not nearly as intimidating as I thought it would be. The fruits of our labor were delicious. And I think when it came down to it, I did have a better appreciation of the meal.

#5 – check!

h1

The Pig Roast Part II: Whoops, Now We Have to Actually Cook a Pig

July 10, 2012

*Warning* This post will contain graphic pictures of a raw and cooked pig.

Last year when I was testing the waters with curing my own meats, I went to the Eastern Market in Detroit and got myself an 8-pound pork belly to cure for bacon. The bacon was delicious with a roasted pork flavor that was deep and rich. The difficult part for me was that the nipples left on the belly made me a bit squeamish. I conveniently forgot this fact when thinking of a whole pig. Talk about immersion therapy – but I’m getting a head of myself.

In preparation for our pig roast, we sent out evites to a bunch of family and friends. Dave tackled getting our bathroom remodel in order (another story for another time) while I began to research the best place to get a whole pig. Obviously, if you can get a pig right from a farm, go for it. That was not really an option for us, so we went with the next best thing, a wholesale meat provider down at the Eastern Market. I called then three weeks in advance to reserve a pig. Our conversation was confusing and somewhat awkward at best – I blame this on the fact that a) I wasn’t 100% sure what I was talking about and b) the woman insisted on calling the pig that we would receive “Porky” – naming it… bad idea.

Here’s what you should keep in mind when ordering a pig:

1. Plan for 1 pound of dressed pig per guest. We were thinking 50 people, so we got a 60-pound pig (also, that was the smallest pig we could get). The pig will yield approximately half its weight in delicious meat – thus a 60-pound pig will give you about 30 pounds of usable meat.

2. Ask for the pig dressed – unless you want to be gutting it yourself – didn’t think so…

3. Make sure you know whether or not your pig will arrive frozen or thawed. I was assured Porky would be roaming the farm on Thursday and dressed and ready to be picked up on Friday.

4. Make sure to get the price of the pig. Usually it’s a price per pound. Ours was about $2 per pound for a fresh pig.

Here’s the breakdown of our cooking process:

Friday, June 29th

2pm Dave left work and went to pick up the pig.

2:30pm Dave called me with this message, “we’re not on the list. Did you order the pig?”

Can we say freak out? Turns out that there were several pigs hanging with names written on the side, but none of the pigs said “Julie” or “Dave” and our names were strangely absent from the whole pig list. Thankfully they were able to “find” us a 62-pound pig, wrap it in plastic wrap, and send it home with Dave.

3:15pm Dave walked in with the pig slung over his shoulder. He was immediately elevated to godlike status in the eyes of our pets, especially our new dog, Clover.

Dave and pig

Dave and pig again

So there we were, the day before the party with a 62-pound pig and… no where to put it. It certainly wouldn’t fit into our fridge and we weren’t going to spend $200 on a huge cooler just to temporarily house a pig carcass. The solution turned out to be super easy – the bathtub. We cleaned it out really well (before and after the pig, I promise), laid the pig inside, and covered it in bags of ice.

We spent the rest of the night alternately cleaning the house and doing last minute research on the Internet. Originally, we had thought that it could take up to 12 hours to fully cook our pig, but given how small our pig was and the fact that we weren’t going to stuff it, we reasoned 6-7 hours would be plenty. This was the hardest call for us to make – if you’ve tried looking up proper cooking times for whole pigs on grills, you know that it can vary and there are no guarantees that your pig will be done in time for your party. We used the ultra scientific method of reading a lot, averaging, and finally guessing. We knew we wanted the pig to get to 160 degrees F in order to be thoroughly cooked and we *hoped* that 6-7 hours would get us there.

On the morning of the pig roast, we woke up at 8:30am. The plan was to start the charcoal at 9am and throw the pig on at 10am. Instead, I woke up with the terrible realization that our grill on the roaster would place the pig way too close to the coals. Luckily, we live five minutes away from a Home Depot, so we raced over and found some bricks. We covered the bricks in foil and placed them on the support bars. With the added height of the bricks, the pig would rest about 8-10 inches above the coals (not quite the recommended 12 inches, but it would have to do). Here’s how it looked:

bricks

We used two chimneys to start the charcoal and poured them evenly at the bottom of the roaster. All in all, we put about one 18-pound bag of charcoal in the roaster and let it get hot.

Smoking

While the coals heated, we took the ice off the pig and rinsed it off. We rubbed the whole thing down with kosher salt and pepper. We rubbed the belly cavity with salt, pepper, onion powder and garlic.

Pig in the tub

Dave carried the pig out to the back where we had the roaster resting on the cement. For safety per cautions, we put a layer of heavy duty, grill foil on the chicken wire to catch any grease and had the hose handy.

Dave

And then we put the pig on the grill like this:

Wrong

Problem. There was no way it was going to cook evenly on its side and we didn’t want to have to flip it halfway through cooking. I suddenly recalled how I had read that some people had cracked the spine on the pig in order to get it to lay flat on the grill… and with no time to spare (it was already 10:20am!) Dave grabbed a mallet…. and beat the pig’s back repeatedly to crack the spine in four places.

No picture of that – I was too busy cringing at the dull thuds of the mallet striking pig flesh.

At 10:30am, we got the pig on the grill, laying it as flat as we could get it. We checked it after one hour at 11:30am and covered the face in foil in order to keep it from burning. Here’s how it looked:

one hour in

Ideally, the temperature needs to be constant around 225 – 250 degrees F. Ours ran a little hotter than that. We splashed the coals with water to bring it down at times, but ultimately we couldn’t always guarantee it was low enough.

About halfway through the cooking at three hours, we pulled the edges of the grate up carefully and added another bag of charcoal to the roaster.

Halfway

Then we virtually forgot about the pig until 5:00pm. Ok, we didn’t actually forget about the pig, but we didn’t fuss over it and threw ourselves into last-minute party things like making dip and throwing junk into odd places of the house where people wouldn’t notice it. People started to come over at 4:30 and at 5:00pm we held our breath and stuck a digital thermometer into the thickest part of the pig’s leg. We were shooting for 160 degrees F. We got 185 instead. A moment of panic ensued. *Later we found out that this was not the end of the world. The pig was juicy enough that the meat was super moist and tender. Phew!

Here’s how it looked after 6.5 hours on the roaster:

Done

And here we encountered a problem. The foil we put on the grate kept the grease from the charcoal. Unfortunately, when we began to move the pig, some of the grease drained onto the charcoal which caused little flare ups of fire. It took four people very carefully lifting the grate, one at each end, with pliers and hot mitts. We had a table set up next to the roaster so they did not have to go very far – however, I’m pretty sure it felt like a mile.

moving the pig

We let the pig rest for about 20 minutes. In that time, I managed to rope our friend, Amanda, into carving the pig with me. Our conversation went something like:

Me: Hey Amanda, how do you feel about carving meat?
Amanda: Usually I leave that to Chris (her fiance).
Me: Great! Here’s an apron and a knife and tongs. Let’s just step outside…

Amanda was a good sport though and in no time we had the pig carved with the meat shredded into aluminum pans for people to help themselves to.

Carving

Carving two

The 62-pound pig produced about 30 pounds of meat, which we fed to 50 guests. There were only a couple pounds of meat left after all was said and done – not the mountains of leftovers that we were dreading. The meat was delicious. It was moist, flavorful, and almost unrealistically tender. We served it with several choices of bbq sauce and side dishes that all of our guests had brought. Nothing went to waste. We scraped the bones clean to get all the meat. Clover graciously worked on the ears. Even the eyes didn’t go to waste because Dave and my co-worker’s husband ate them. Dave described the experience as “squishy but strangely porky.”

eye

All in all, we chalked up the pig roast as a success. We had a great time throwing it and are even talking about making it an annual event. It was much much easier than we thought it would be. For anyone thinking of throwing their own – I would say go for it! And invite us, please 🙂

h1

The Pig Roast Part I: How to Get Started

July 10, 2012

Last November, Dave and I were driving to a friend’s house for dinner when we started talking about pig roasts. I’d never been to a pig roast and it had been years and years since Dave had been to one. Since there didn’t seem to be any invitations coming anytime soon, we started thinking of hosting our own.

So here is an account of how we hosted a pig roast. We’re not saying it’s the *right way* but it’s the way we did it. If you’re going to undertake it yourself, we would suggest doing as much research as possible and taking the necessary safety precautions.

To start, we obtained a 55 gallon metal drum from a friend who had the hook up from a bakery. The drum had been the home of corn syrup and needed a really good cleaning before we could do anything with it. Dave took one for the team and cleaned it out with a good dose of PBW from his beer making stash.

This is the drum:
The Drum

We then took the drum over to Dave’s younger brother, Patrick’s house. Patrick works on cars in his garage and had all the tools, including welding tools, to turn our ordinary drum into a pig roaster. Here’s how they did it:

1. They cut the drum in half length-wise using a Sawzall.
Saw It

Be smarter than we were – wear safety glasses and ear protection. Laziness like ours is not an excuse.

Not the smartest plan

2. We admired their hard work. Dave then began sanding all of the sharp edges down using an electric sander.
Half the drum

Sanding

3. Meanwhile, Patrick cut 4 long pieces of scrap metal to be fitted into the bottom of the pig roaster. Dave sanded off the paint to weld the metal to the inside of the bottom half. He also sanded the edges of the scrap metal to clean off the rust. *A note on this step: we placed the scrap metal pieces halfway down the bottom of the pig roaster. We should have placed them higher to make room for the charcoal. This would bite us in the ass later. Don’t be like us, place the metal at ¾ of the bottom of the pig roaster.
Bottom

Sparks

4. And then the welding began! Patrick welded all the long pieces into the bottom section of the pig roast to create support for the grill. He also found a piece of pipe and welded it to the top section to create a handle.
Welding

Almost done

5. While Patrick was slaving over the welding, Dave and I ran to Home Depot where we bought three hinges and chicken wire. When we got back, Patrick welded the hinges onto both halves to connect them. And while Dave and I were contemplating how exactly we would stand up a round pig roaster, Patrick was busy cutting more scrap metal and welding away. Like magic, he created four sturdy legs for our roaster.
Finished

Open
(Pig roaster says “FEED ME PIGS!”)

*Not pictured is the chicken wire we cut to fit the drum. We laid this across the support bars to create a grilling surface.
Stay tuned for The Pig Roast Part II – this one will contain graphic pictures of our pig before and after it was cooked. Beware.

h1

Meet our newest family member

June 25, 2012

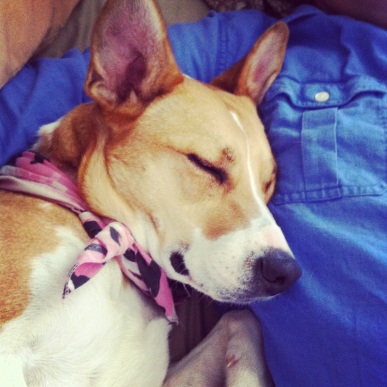
I would like to introduce our newest family member, Clover:

Image

Many of you know that we’ve been trying to adopt a dog for a while without good luck. All that changed yesterday when we went to Pet-A-Palooza, an adoption event at the Palace in Auburn Hills. We got there and half an hour later we left with Clover, whom we had fallen in love with at first sight.

Clover is a 2-year-old, Basenji mix. She’s about 40 pounds. Here’s what else we know: She is spayed now, but gave birth in May to 9 puppies! She walks with a little limp because somewhere down the line she was shot. The high caliber bullet lodged itself in her shoulder muscle and the vet can’t remove it. She’s not in pain and she can still run; it’s just not the prettiest run you’ve ever seen.

And finally, she’s a cuddle monster. Our cuddle monster 🙂

Here’s Clover with Dave about two hours after we brought her home. Being adopted is hard work!

Image

h1

Winner

June 2, 2012

And the winner (per random number generator) is:


#9: Lori!


Thanks to everyone who entered. Lori, I’ll contact you for your address and get that quilt out to you 🙂